It has been a while since I’ve posted in the blog — where has the time gone?! I decided to do a series of “questions and answers,” inspired by years of talking on the phone with my customers. I hope this will be helpful. The first will be on the subject of installing the tiles, with a few tips and hints. This is a DIY guide to installing brick tiles, geared to home owners who would like to do this themselves.
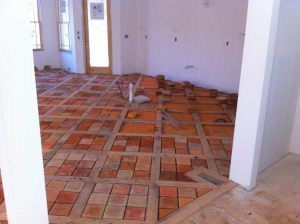
Brick tile installation in progress
As with any tile, you want to be sure you are installing over a firm surface. If you are installing over cement, you already have a solid bed. If you are installing over a wooden subfloor, you need to add a substrate, like concrete board. You may not realize it, but when you walk across a wooden floor, it sets up a bounce. Inglenook brick tiles will not be harmed by this, but you may pop the grout over time. Regular 1/2″ cement board is most often used. You would lay this over the plywood subfloor, and screw it down securely with deck screws every 6 to 8 inches. Your hand-held electric screwdriver makes this job fast and easy. You may even want to put a material like liquid nails between the layers. Then you would tape the joints to create a seamless bed for your tiles. If the height is a problem with 1/2″ cement board, Schluter makes a product called Ditra, which is very thin. Blanke Permat is another similar product that our customers like to use.
The quantity of tiles we send for an order assumes a 1/4″ between the tiles. Some of our tumbled tiles have a ledge around the edge, and that ledge is covered by the grout. For the grout stability, it is important that you still have a gap between the tiles, so that the grout is not just laying on the shallow shelf, but also reaches to the substrate. The tumbled edges create a “thick and thin” grout line.
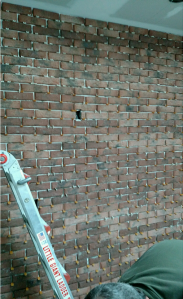
Using spacers in brick tile wall installation
You will cut the tiles on a wet saw. They are too tough to score and snap. Working with a wet saw is like working with a circular saw that spits water. These can be rented from an equipment rental business, but you can buy a tabletop model from a box store — probably cheaper than you can rent it for a day or two. I have always been glad I have mine, and have been happy to loan it to friends. You will often need to cut your tiles when you come to the edge of your tiling area.
If you are laying the tiles on top of cement, you will want to dampen the cement. This is so the moisture isn’t pulled out of the thin-set skim coat too quickly, which weakens the bond. You may also make the tiles damp, for the same reason. You want this to dry relatively slowly on a cement base. Trowel the thin-set adhesive over the base, and spread with a 1/2″ notched trowel. Nest the tiles over the thin-set, and use light pressure to create a bond. Let your floor dry thoroughly, but not too quickly. Some installers will cover the floor with tarps for a day or two, to create a better bond.
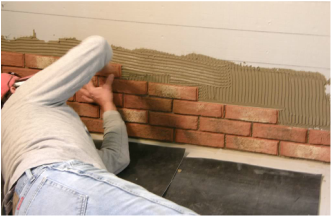
Installing brick tile using thin set on a wall
If you are laying the tiles over subfloor and cement board, then use any thin-set adhesive. Some installers will use a quick-set material. Nest the tiles in the thin-set the same as above, and then let the floor dry. This drying time will vary, depending on the material used, the temperature and the humidity. If you are covering a wall or ceiling, then use a non-sagging adhesive. Laticrete Multimax is a great choice for walls and ceilings.
When your thin-set is dry, you are ready to grout. Use either a brick mortar, or a sanded grout. There are many colors available at box stores. For most installations, I personally prefer a basic off-white/pale gray color of a traditional lime mortar. Another color I like is Haystack, by Polyblend. That is easily found at Home Depot. I don’t think that gray grouts with blue tones in them compliment the tiles. There are grays that have tan tones, and that is warmer with the brick color. Remember that the sealer you use may darken the grout. If you want to get more creative, Lime Works (www.limeworks.us) makes historic lime mortars, and some have slag flecks or ground-up oyster shells in the mix. When choosing your grout, I sometimes suggest that you buy small boxes of a few different colors, and mix them up in a paper cup. Put the wet grout on a piece of aluminum foil or a paper plate, smooth it out a bit, and let it dry. If you are impatient, you can put the setting grout near a heat source (or in the sun) to hurry the experiment. When completely dry, put some of the sealer on them. That way you will have a better idea of how the grouts may be transformed by the sealers. There is one penetrating sealer that I often suggest, which dries back to the original color, but others will darken or enhance the color.
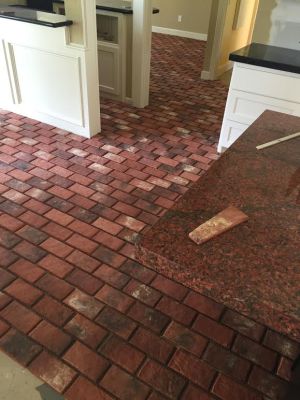
Installed and ready for grout
Mix to the manufacturer’s directions. When you think about the method of grouting your tiles, consider the look you want. Do you want a smooth, sponged grout line that is level with the top, a slightly indented smooth line, or one that is more rough? How you grout will also affect the amount of clean-up after filling the joints.
Some people like to bag in their grout, or use a refillable caulking gun. Others mix a thicker mortar or grout consistency, and then trowel it in. You will mix smaller batches to do this. This is the traditional way masons fill in the joints of brick and stone. The nice part about this method is that the surface stays cleaner. Just let the excess grout or mortar lay on the top, and sweep it away when it sets up. Put the mix on a board, hold the board along the joint, and cut a line of it into the gap. Tamp it down with the edge of the trowel to remove air pockets, then turn the trowel sideways to “strike the joint.” That is removing any excess material that is sticking up above the surface. You will get a rougher joint when you do this. You can also use the curved bowl of a spoon to smooth the line, and make the joint a little lower than the surface, if you prefer that look. Alternately, you can use a wet sponge to make the grout level with the top. You will have more clean up to remove the grout haze later when you use a sponge (unless you seal with Enrich ‘N’ Seal). Some people “float” the grout. Do not expect to get it out of the texture of our more rustic tiles, if you do that. However, many people like the grout in the texture. You just need to be sure you are one of them before you grout this way. If you are using one of the tiles in our Manor Collection, you won’t have to worry about it sticking in the texture. After rinsing the floor until the water runs clear, you let it dry. Then you can use a commercial grout haze remover, or a dilute muriatic acid wash (rinse it well afterward, and wear chemical gloves) to clean off the cloudy haze. Some customers have used white vinegar, but it is more time-consuming to let it sit on the top and keep rinsing. You can also seal with Aqua Mix Enrich ‘N’ Seal to remove the haze. Be sure you want a matte finish if you use it, though, because no shiny top coat will adhere to it.

Grouting Inglenook brick tile
Your last step will be sealing your floor or wall. There are sealers that will give high shines and low shines, and others that are invisible and matte. There are many products on the market. You can get them at any box store, or on line. I have found primetimesolutions.com to be a good source for online ordering.
I like Enrich ‘N’ Seal (Aqua Mix) as a penetrating sealer. Not only does it do a great job sealing, but it also will remove any haze that you may have on your tile surface. Just be sure not to let it puddle on the tiles — remove excess before it dries. You will also be sealing the grout. The tiles will be darker after using this product. If you love the color exactly as it is, then Tile Lab makes Surfaceguard Penetrating Sealer. That will not remove haze, but it will dry to the color the tiles were before sealing them. Tile Lab, Behr, Aqua Mix, Miracle Sealants all make different levels of shine, and so do other companies. The penetrating sealers are one coat, and good for about 15 years. The ones with a shine require several coats, and may need to be refreshed in high traffic areas every few years.
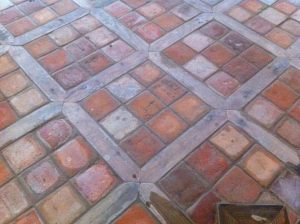
Installed brick tile floor – ready to get sealed
Done! Take a picture and send it to me!